
Sensor 101: How Your Safety System Actually Works
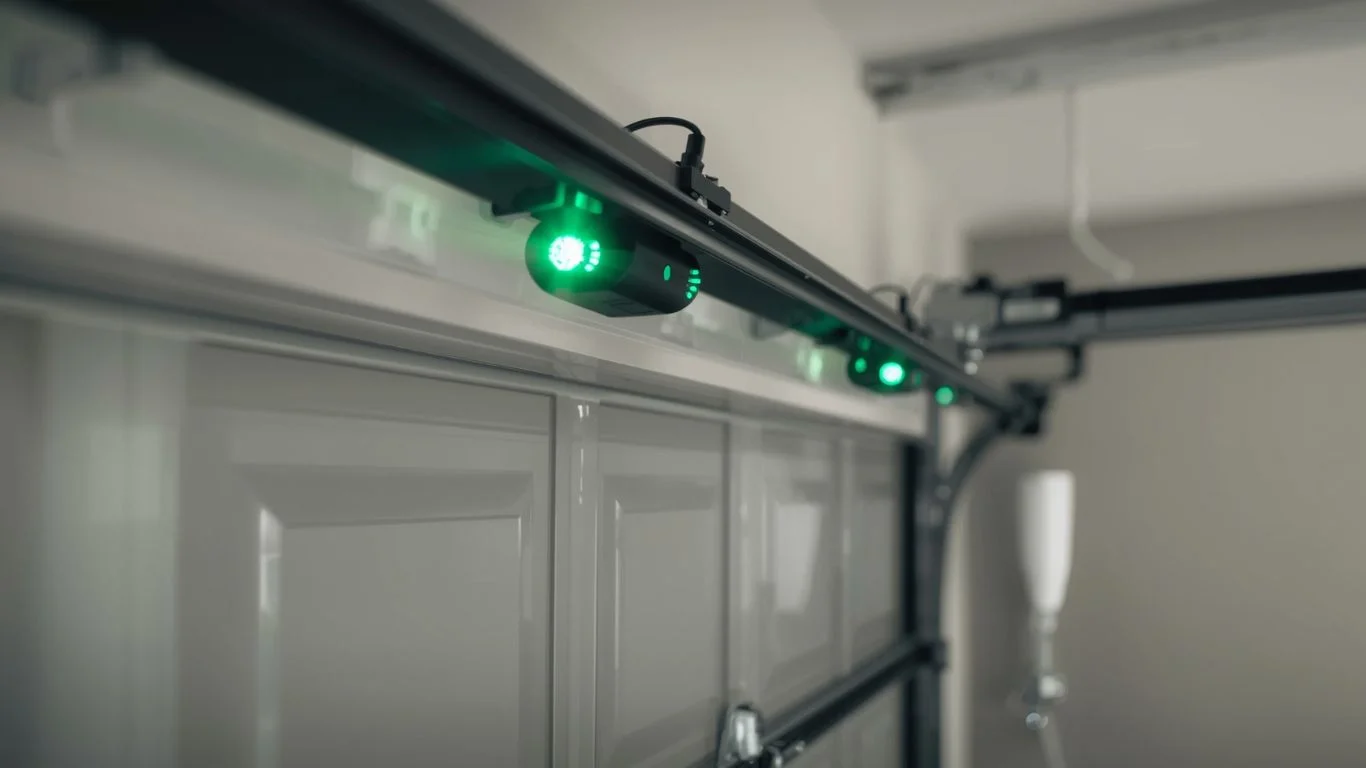
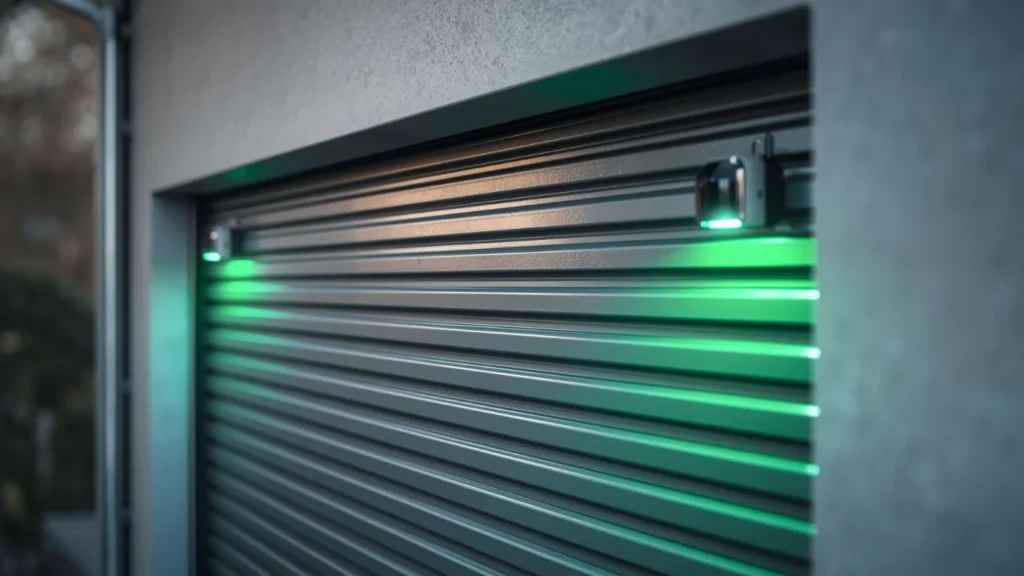
Modern garage door safety sensors (aka photo eyes, photoelectric safety sensors, safety reversing sensors) sit near the bottom of each garage door track, typically 4–6 in. above the floor. One unit is the transmitting sensor/sending sensor (emitter eye), which shoots an invisible IR beam across the door opening. The opposite unit is the receiving sensor/receiving eye, which confirms it “catches” that beam.
- If the beam is blocked or misaligned, the opener must not close.
- This behavior is required by UL 325 safety standards to prevent injury and property damage—bypassing is a safety hazard and can void warranties.
Typical LED behavior by brand (rules of thumb, not gospel)
- LiftMaster/Chamberlain/Craftsman (many models using safety sensors 041-0136):
- Sender: Amber/yellow = powered.
- Receiver: Green = aligned/beam detected. (Flicker = borderline.)
- Genie/Overhead Door:
- Often green + red/amber or dual green; newer smart sensors vary.
- Other brands:
- Colors differ, logic is the same: one LED = power; the other = beam reception.
So, should both be green? Sometimes yes—but on lots of systems it’s green + yellow. The colors alone aren’t universal; the meaning is.
What Your Sensor Lights Are Trying to Tell You
- Solid green (receiver) + solid yellow/amber (sender): Normal on many systems—beam good, power good.
- Both green: Normal on certain models—consult the garage door model manual.
- Green flickers or drops out: Sensor alignment is marginal, vibration/bent mounting brackets, or dirty sensor lenses.
- No light on one sensor: Power supply issue, wiring issues, or faulty sensors.
- Both lights on but door won’t close: Possible logic board fault, wiring faults, or unrelated mechanical issues (springs/rollers/bind).
- Opener’s lights flash when trying to close: The safety system thinks the beam is broken or sensors are faulty.
Fast Diagnostic Flow (15 Minutes)
- Look: Are the LED lights on both units? Note colors (green/yellow).
- Clean: Unplug the opener; wipe sensor lenses with a microfiber cloth. Cobwebs & water spots scatter IR.
- Align: Loosen each wing nut, point photo eyes directly at each other, then tighten. Recheck the green light (or “beam seen” color) for steady, not flicker.
- Cable check: Inspect sensor wires along the wall/ceiling: no staples through insulation, no chew marks, no crushed bends.
- Terminal check (power off):
- Many openers: white terminal = common (plain white wire color).
- black terminal (or similar) = sensor signal (white/black stripe).
- Re-terminate with proper wire nuts if needed.
- Test close: If LEDs are good and the door still reverses, suspect wiring faults, logic board, or mechanical issues (track bind, broken spring, bent hinge).
Perfecting Alignment (So the Green Light Stays Green)
Tools: screwdriver, small level, tape measure, patience.
- Height match: Both sensors should be at the same height (measure from floor to LED center).
- Bracket tune: Slightly loosen wing nuts; rotate until the receiver shows solid “beam detected.”
- Vibration control: If your garage door system vibrates and the LED flickers as the door moves, add a tiny plastic shim behind the bracket or snug the hardware more.
- Glare issues: Direct sun or headlights can blind older photo eye sensors. Angle them inward a few degrees or add a small shade.
- Corner obstructions: Fresh paint blobs, trim, even a protruding security solution device can clip the beam—clear the path.
Pro tip: Use a string line or laser level from one lens to the other for surgical alignment.
Wiring: Getting the Details Right (Without Guesswork)
- Low-voltage pair typically runs from each sensor to the opener head.
- Make clean, solid wiring connections—no taped twists.
- At the opener:
- White terminal → plain white wire from both sensors.
- Black terminal (or “sensor” terminal) → striped wire from both sensors.
- If one sensor LED is dead but the other is lit, swap the sensor leads at the head:
- If the problem moves, it’s a wiring issue.
- If it stays, suspect a sensor failure or faulty motor head/logic board.
Power sanity check: Verify the outlet/GFCI, backup batteries (if any), and that the Garage Door Opener hasn’t tripped after a surge.
Common Traps (That Look Like “Bad Sensors”)
- Bent tracks or tight hinges: The opener senses high resistance and reverses—mimics sensor trouble.
- Out-of-balance door: Broken spring/cable or heavy bind triggers safety.
- New threshold or thicker bottom seal: The down-limit needs re-tuning (but never over-force).
- Recently painted trim: A proud drip edge can clip the beam.
If your sensors seem fine but the door misbehaves, investigate garage door tracks, rollers, spring balance, and opener force settings.
Replacement vs. Repair
- Repair is fine when: lenses just dirty, brackets bent, sensor misalignment, splices loose.
- Replace when: cracked housings, water ingress, corroded pins, perpetual flicker after perfect alignment, or brand-incompatible sensors installed. Use brand-correct sets (e.g., safety sensors 041-0136 where applicable).
- Never bypass photo eyes. It violates UL 325 and creates a serious safety hazard.
Advanced Troubleshooting (For the Curious/Technical)
- Voltage check (techs only): Many receivers run ~5–6 VDC from the head. No voltage = power supply issue or board damage.
- Blink codes: Some heads use specific flashing lights to report “sensor open,” “short,” or “miswire.” Compare to your garage door manual.
- Logic board: Surges and lightning can partially cook the logic board—LEDs may look normal but the input isn’t processed.
- Hot spots: Late-day sun can saturate certain receivers—shade or slight re-aim usually fixes it.
- Smart sensors: Upgrading to newer smart sensors can improve immunity to glare and vibration.
Local & Pro Help (What to Ask For)
If you’re in Flower Mound, the Woodlands Garage Door Service area, or near the Overhead Door Company of Huntsville/North Alabama or American Garage Door, ask for:
- “Sensor alignment and wiring continuity check, plus opener logic input test.”
- “Confirm terminals (white terminal/black terminal) and verify no short-to-chassis along sensor wires.”
- “Rule out mechanical issues before condemning sensors.”
A good professional technician/garage door technician won’t suggest defeating sensors as a “security service.” They’ll fix the root cause.
Checkout: How to Deactivate a Garage Door Opener?
Safety, Compliance & Why This Matters
- Compliant safety reversing systems are not optional—they protect people, pets, vehicles, and curb appeal (no dented panels).
- UL 325 requires functional photo eyes. Bypassing can expose you to liability and denied insurance claims after property damage.
Know More: Does Cold Weather Affect Garage Door Sensors?
Quick Reference: LED Cheat Sheet
| Symptom | Likely Cause | Fix |
|---|---|---|
| Sender LED on, Receiver LED off | Misalignment or receiver power/wiring | Clean lenses, re-aim, check terminals & splices |
| Receiver flickers | Borderline aim or vibration | Re-aim, tighten wing nut, add shim |
| Both off | Outlet/GFCI, blown board fuse, broken common | Verify power, check power supply, test continuity |
| Both on, door reverses | Track bind, spring issue, logic board fault | Check mechanics, force settings, board |
| Works until sunset | Sun glare | Re-aim inward or add visor; upgrade sensors |
More About: How to Change Frequency on a Garage Door Opener?
FAQs
Not on many systems. Expect green on the receiving sensor and yellow/amber on the sending sensor. Some models show two green—your garage door manual is the tiebreaker.
Minor alignment issue, lens film, or bracket vibration. Clean, re-aim, and snug the mounting brackets. If it flutters only while moving, add a shim.
Look beyond sensors: track rub, bad rollers, weak/broken spring, or a logic board input fault. Also confirm you didn’t introduce a thick threshold that needs a down-limit tweak.
Usually no—mixing triggers weird faults. Use brand-correct Garage Door Safety Sensors; for LiftMaster/Chamberlain/Craftsman, many sets use safety sensors 041-0136 with square LEDs.
Typically 4–6 inches off the floor and directly facing each other. They must share the same height and line-of-sight.
Read More: How to Seal Gaps in a Garage Door?
Maintenance Mini-Plan
- Quarterly: Clean lenses, verify solid LED, check brackets, look for chewed or pinched sensor wires.
- Seasonal: Re-aim after big temperature swings; sunlight angle changes can matter.
- After any door work: Re-check sensor aim; confirm reversal on obstruction.
Shopping & Web-Security Note
When researching parts or booking service, if a site throws a weird error—Cloudflare Ray ID, “site owner,” online attacks, SQL command, malformed data—it’s usually a firewall hiccup, not necessarily a scam. Still, don’t enter personal info on a broken page; call the company and confirm details.
Bottom Line
- No, both sensor lights don’t have to be green on every system.
- What matters: power at the sending sensor and beam reception at the receiving sensor.
- Start with cleaning, sensor alignment, and verified wiring connections; escalate to sensor replacement or opener logic board diagnosis if needed.
- When in doubt, call a vetted garage door repair pro for a quick, code-compliant fix.
If you want, I can tailor this to your exact garage door model and opener brand, or turn it into a printable checklist for your team.
Comments are closed